Install clustered WordPress in 1 click
Clustering technology can minimize the risk of downtime and multiply the instances of a website on multiple servers to keep it always available and fluid during peak loads.
The WordPress cluster provided by Oxacloud helps to deal with continuous high loads and huge peak loads, ensures zero downtime and improves performance. Thanks to the virtualization of hardware resources, Oxacloud offers the possibility of creating, cloning and distributing cluster environments to meet any need. Usually, WordPress cluster deployment is quite long and complex, but with Oxacloud most of the work is done by the platform. A few clicks are all it takes to specify your preferences.
Start the installation by following these few steps
1. Go to Oxacloud Marketplace and choose WordPress Cluster
Registered users can install WordPress Cluster Kit from the Marketplace directly on the dashboard. Clustered WordPress can be immediately used in production, you can also create development environments to test your applications or use different versions of PHP.

2. Set up the scaling strategy and activate preferred features
In the opened installation window, you can customize your WordPress cluster, and activate preferred advanced features.
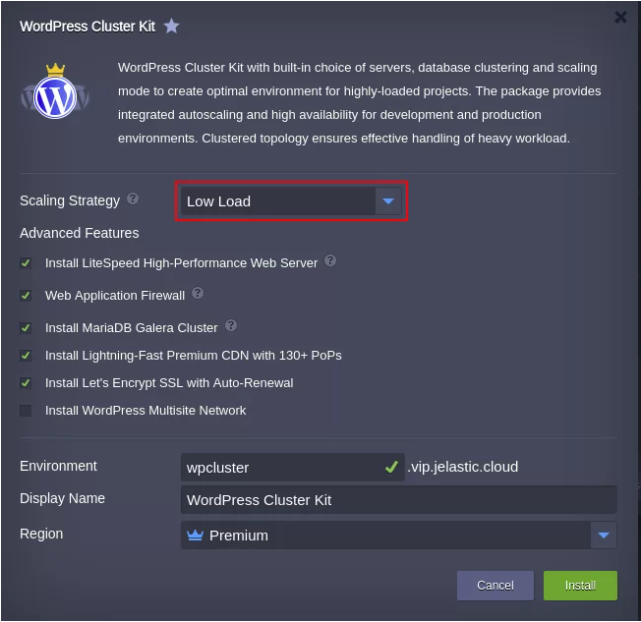
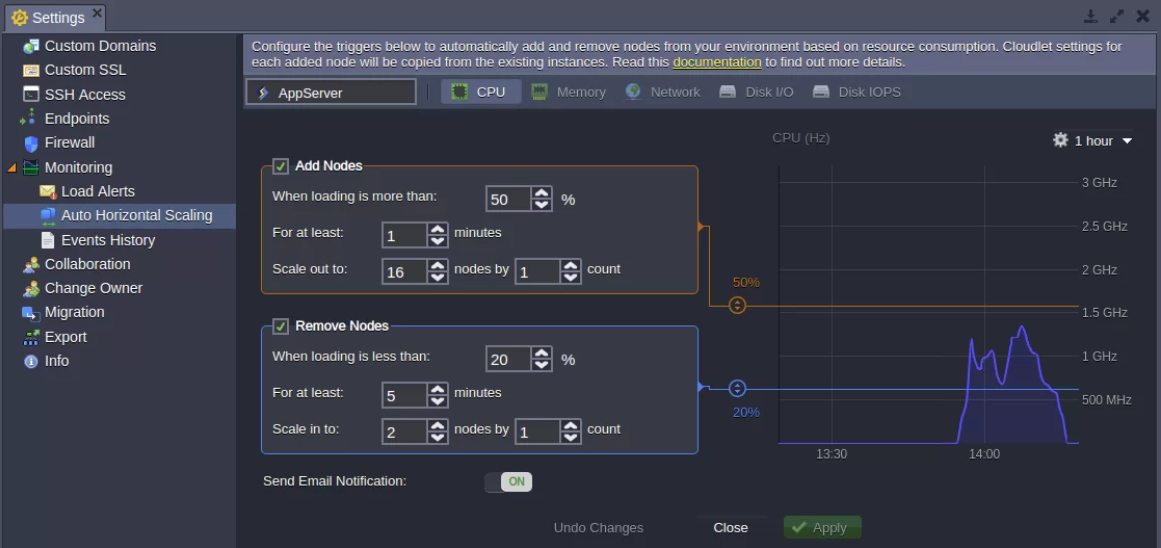
Oxacloud allows input / output servers to scale automatically using specially configured triggers. Based on our experience, we offer three common scaling scenarios for WordPress to avoid overload (these settings can be adjusted after installation):
- Low load
- add 1 application server node if the workload is over 70%
- remove 1 application server node if the workload is less than 20%
- Average load
- add 1 application server node if the workload is over 50%
- remove 1 application server node if the workload is less than 20%
- High load
- add 2 application server nodes if the workload is over 30%
- remove 1 application server node if the workload is less than 10%
Specify the environment name, display name, choose the availability region (if available), and click Install. And then wait a few minutes for Oxacloud to configure your WordPress cluster.
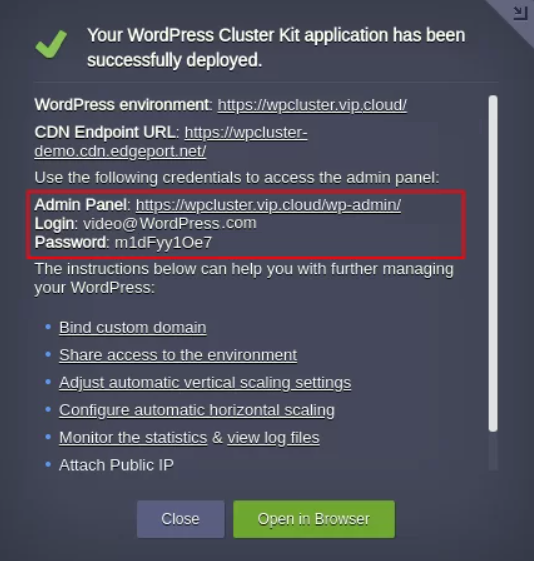
Use the links and credentials from the successful installation framework or the appropriate email to manage your WordPress app (or even create a network).
3. Configure the domain and SSL certificate
For production, the environment must have a public IP address and a custom domain that helps share information about your resource across the Internet. If WordPress was installed with the Let’s Encrypt SSL add-on, the public IP address was automatically added to the Load Balancer node.
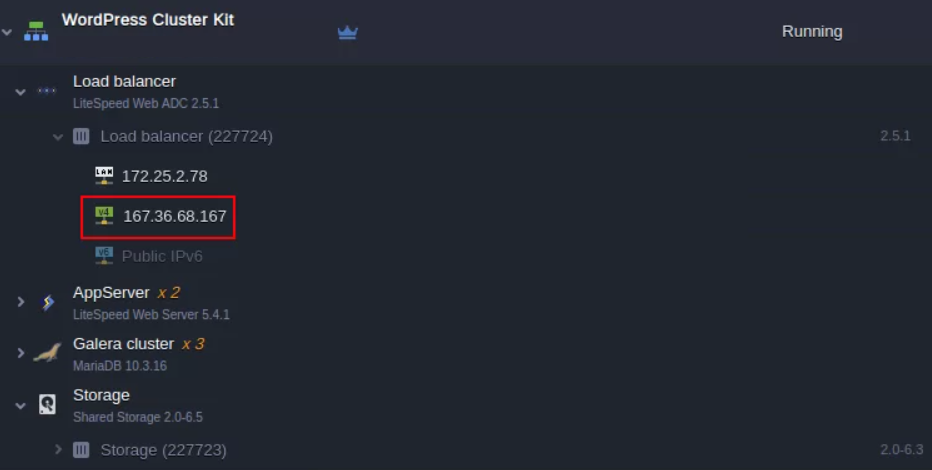
The next step is to bind a custom domain to the environment and issue a trusted SSL certificate for it:
- Create an A record for your custom domain that will map it to the public IP address attached to Load Balancer,
- Then find Let’s Encrypt Free SSL among the Load Balancer add-ons and click on the Configure button,
- Paste the custom domain (for example, vip.wpaas.pro) into the respective field and click Apply.
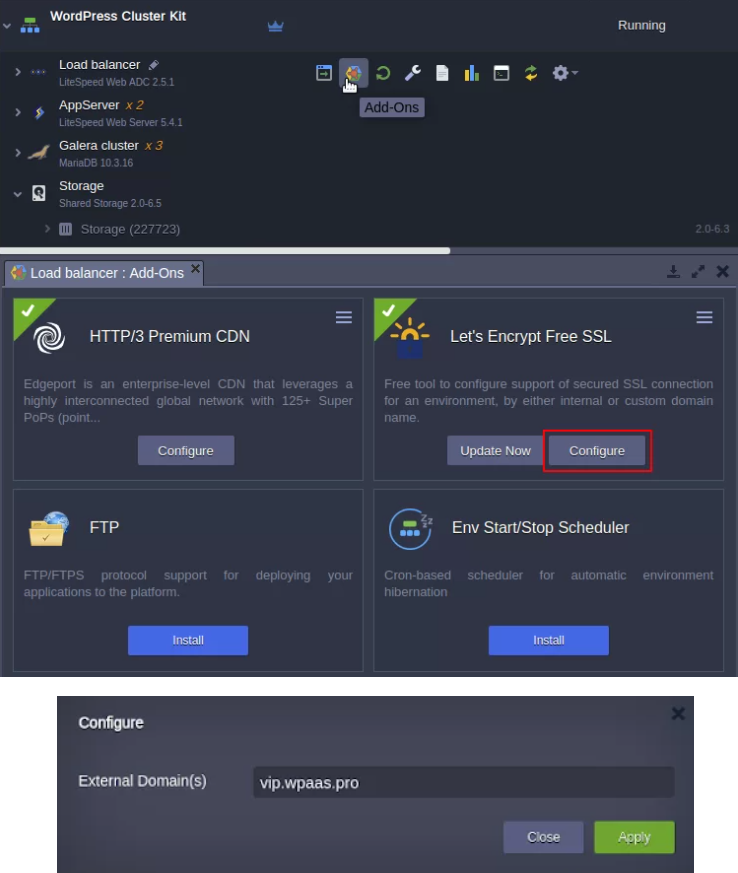
The last step is to make sure that all of the links in your WordPress app point to the custom domain:
- Open the admin panel using the link and credentials from the successful installation window or corresponding email.
- Go to settings and check if the WordPress Address (URL) and Site Address (URL) fields contain the correct custom domain. If necessary, change it.
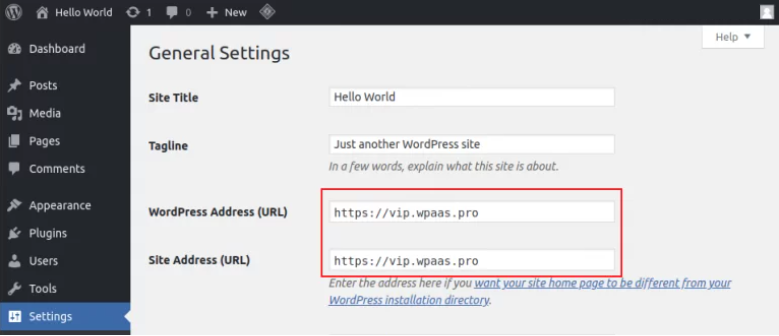
Finally, click on the Save Changes button at the bottom of the Settings page and open the app with a new address.
The setup of your clustered WordPress environment with Oxacloud is complete and you can use it in production immediately without worrying about overloading the website. You can also create development environments to test your applications or use different versions of PhP for example. For more information, please feel free to contact us

